
How to add the fixed version to jira backlog
How to add releases to Jira? How to add fix versions to Jira?
In Jira we manage the release with fix versions.
Here is a video that explains it all, or you can keep reading for detailed instructions.
Steps to add a fix version to Jira
- Navigate to your project.
- In the project menu, click on Releases or from the side bar of any user story click “Create new version”
- Select the Version name text box, enter a name, and click Add.

How many Fix Versions should I create? How many releases should I create in Jira?
I don’t suggest you create too many fixed versions up front as it can become too difficult to keep track of. As a best practice, creating up to 3 versions at a time for the same project is better, however it depends on your project, your resources, your estimates and your requirements.
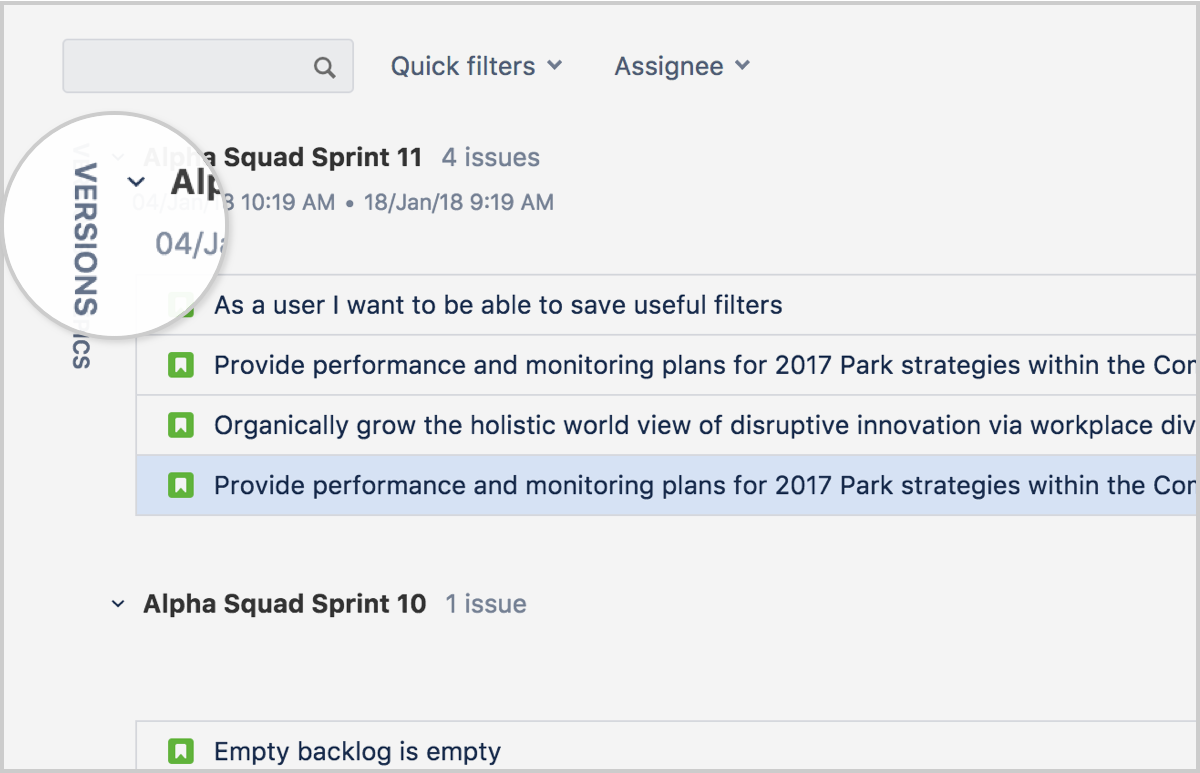
Add issues to fix versions in Jira
- Navigate to the project backlog.
- Open the Versions panel on the left.
 Drag an issue to the version you want to add it to.
 Drag an issue to the version you want to add it to.
Checking the Progress of a Release
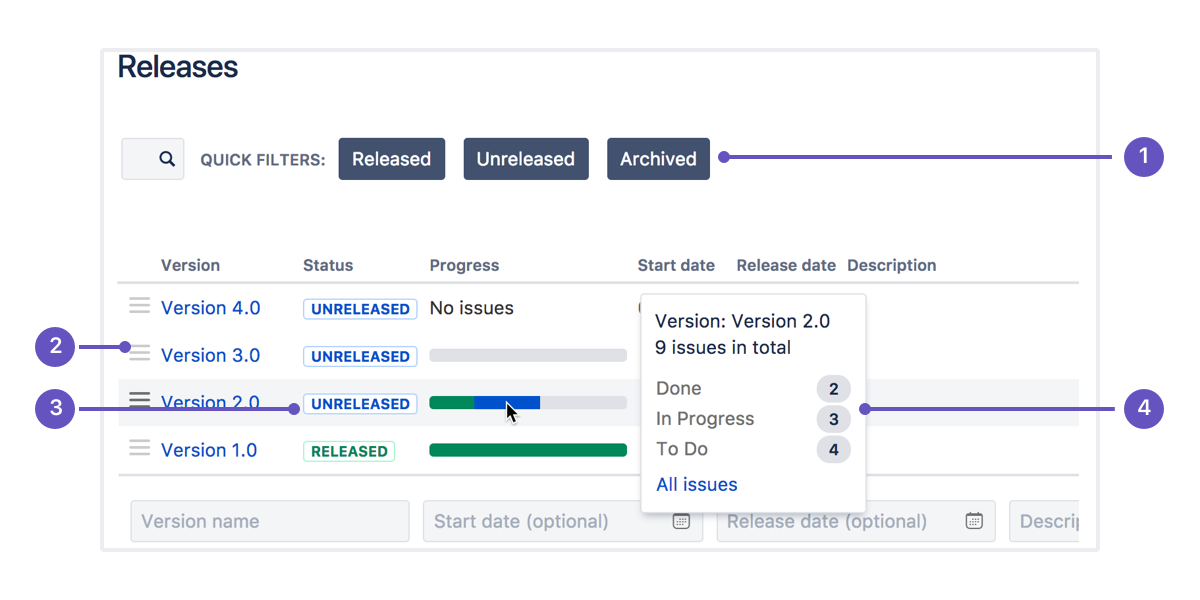
- Quick filters: Focus on specific versions by filtering out the ones you aren’t interested in.
- Version list: Drag and drop versions to reorder them.
- Status: Versions can have one of three statuses: Unreleased, Released, or Archived.
- Progress: This shows how many issues have been assigned to the version, and how many are in each status.
Release burndown chart (Scrum only)
The release burndown chart shows how much work has been completed, and the total work remaining. Burndown charts are used to predict your team’s likelihood of completing their work in the time available. They’re also great for keeping the team aware of any scope creep that occurs.
- Navigate to your project.
- In the project menu, select Reports.
- Select the Release burndown.
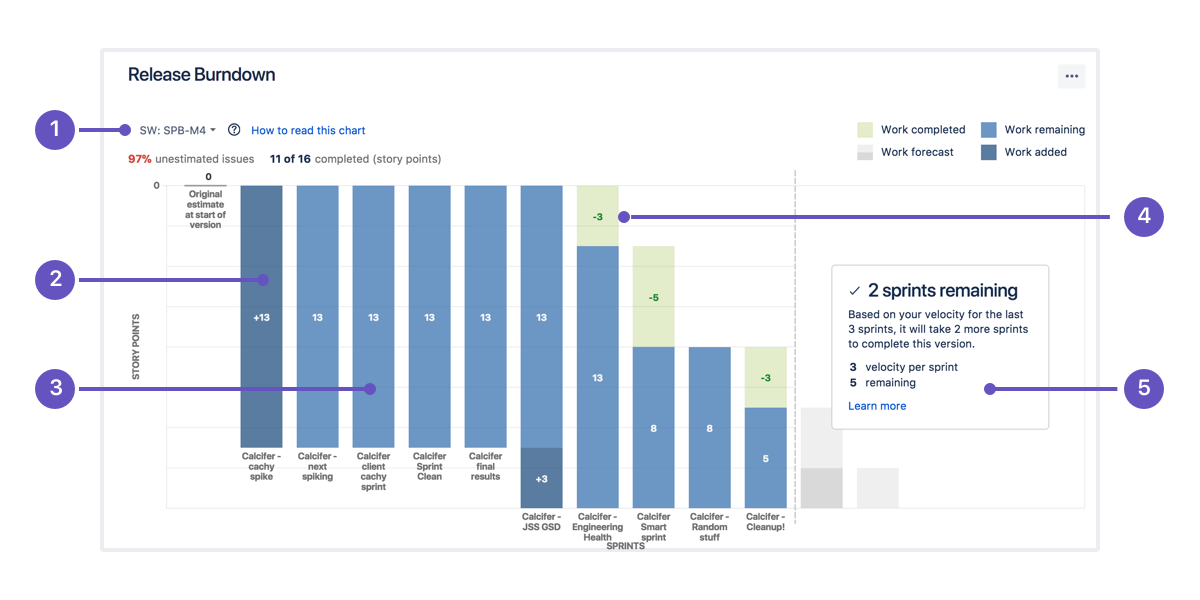
- Release menu: Select which release to view data for.
- Work added: The dark blue segment shows the amount of work added to the release in each sprint. In this example, work is measured in story points.
- Work remaining: The light blue segment shows the amount of work remaining in the release.
- Work completed: The green segment represents how much work is completed for the release in each sprint.
- Projected completion: The report projects how many sprints it will take to complete the release, based on the team’s velocity.
Deploy a version
In order to release all the user stories have to be complete and in a done status.
To deploy a release, you would typically release the version in Jira Software, build the release, then deploy the release to the required environment.
- Navigate to your project.
- In the project menu, select Releases.
- For the version you want to release, select Actions () > Release.
 ) > Release.
And it’s out there!!! Congrats you deployed a release successfully.
Find out more about hira in this article: Is Jira and Confluence the same?
For more on Jira tutorials checkout my playlist on Youtube: https://bit.ly/3ixfcnG